Creating A Marketplace
Step 1 - Register and Login
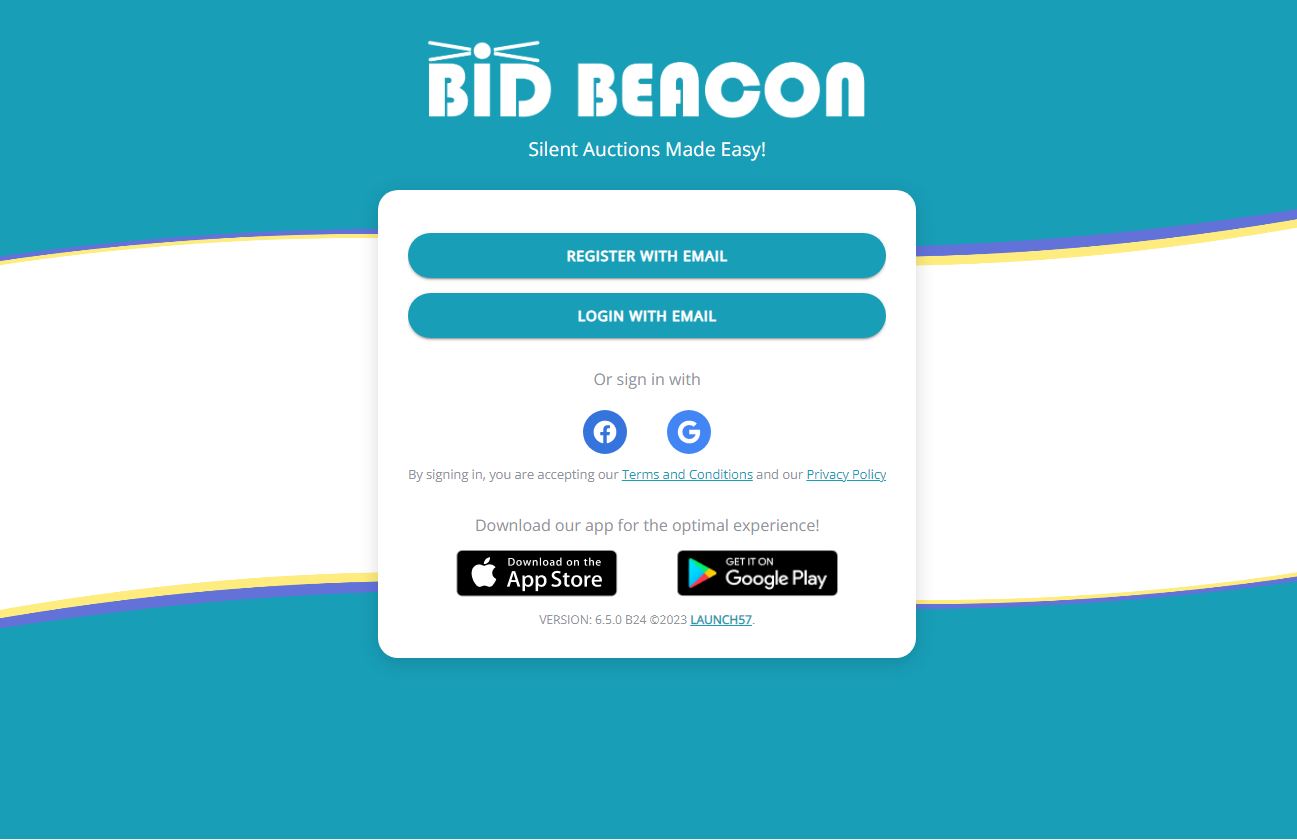
Admin access to Bid Beacon is only available on a web browser from any device (phone, tablet, computer).
The downloadable app is great for guests but can not be used to access the Admin Dashboard or create a marketplace.
Admins and guests create accounts the exact same way. Go to app.bidbeacon.com and Register With Email, or sign in using an existing Facebook, Google, or Apple account (if on iOS).
If on a mobile or tablet device and you want to manage your marketplace, use the following link: web.bidbeacon.com
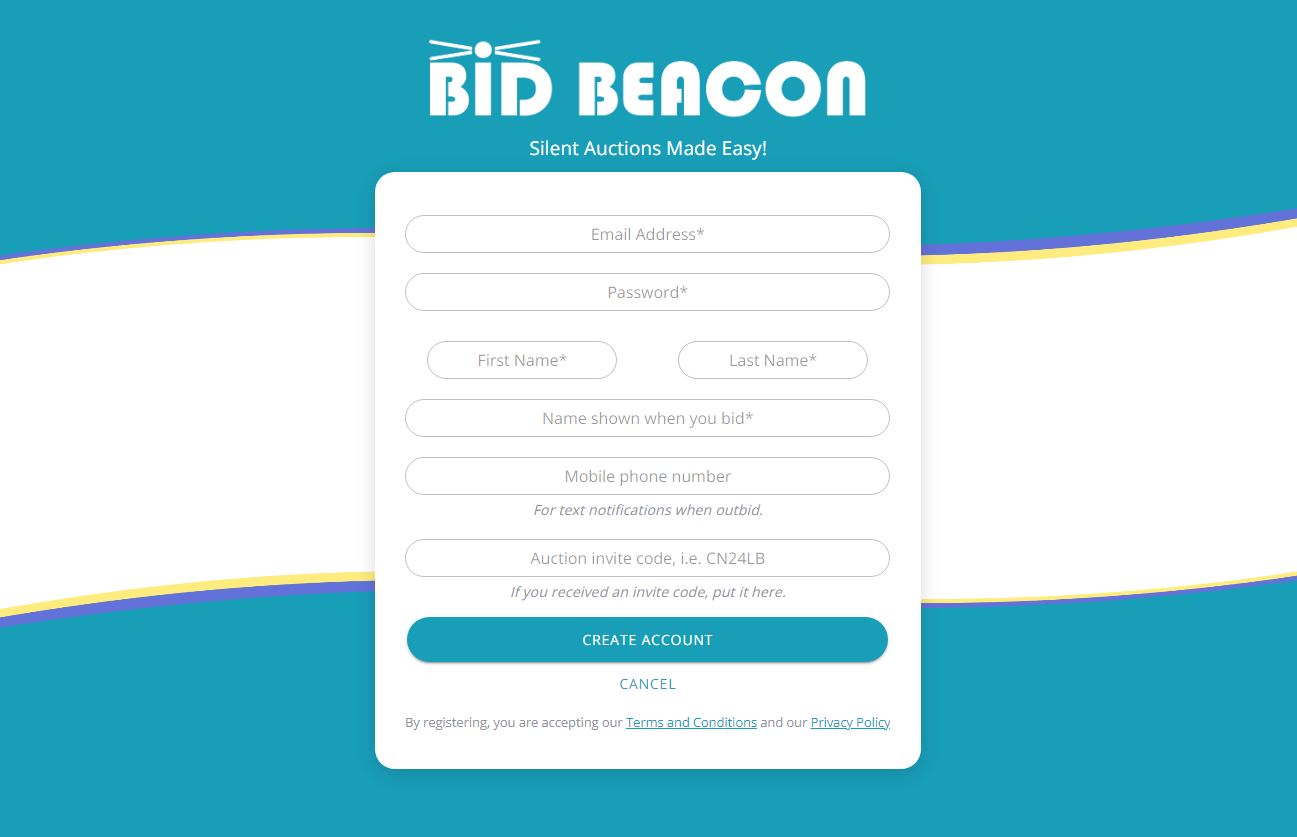
If registering with an email, fill in the following details:
- Email Address: Used as your log in and for communications about your marketplace.
- Password: Can be changed later if you forgot or mistyped
- First Name: Your first name
- Last Name: Your last name
- Display Name: Can be a version of your name, or something more unique
- Mobile Phone Number: Optional, if used you will receive text message notifications related to the marketplace
- Access Code: Leave blank for now. Access codes are a way for guests to register and quickly join your marketplace
- Click Create Account
Step 2 - Create Marketplace
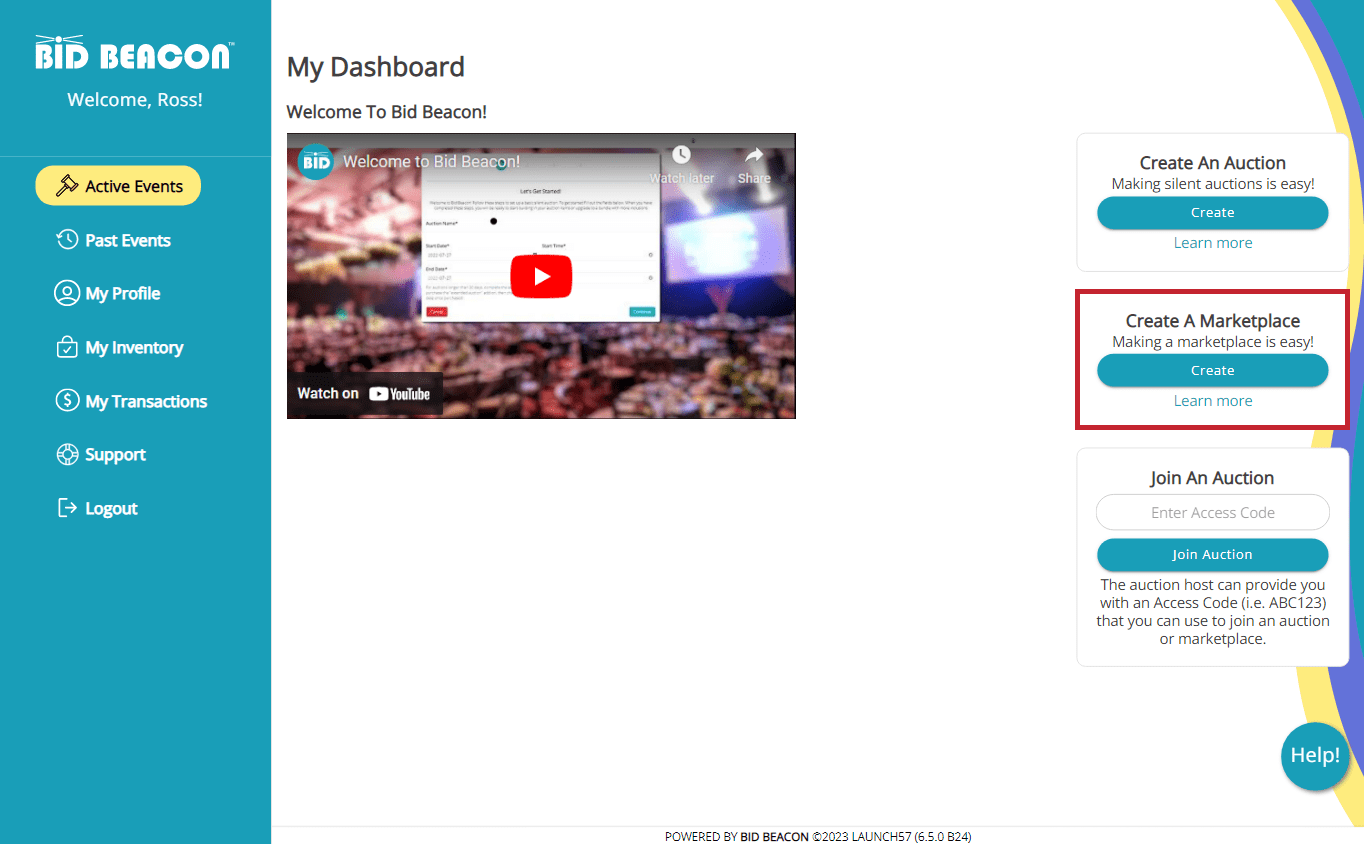
To start, under Create A Marketplace, click the Create button. Follow the
steps from the setup wizard to set up a basic marketplace. Details provided within the
wizard can be changed later in the Marketplace Dashboard.
Let's Get Started
Organization Details
Review
Let's Get Started
Marketplace Name
Choose a name that relates to your brand and the products that you plan to offer.
Organization Details
Organizers Name
Organizers Email
Country: *this determines the currency that your marketplace collects payment in State or Province: *if in Canada or USA
City: the location of your organization
*All details can be edited later
Review
Confirm your details and then click Go To Dashboard to view your marketplace’s dashboard.
Step 3 - Enter Your Details
From your marketplace dashboard, work through each of the tabs on the left side menu.
Quick Actions take you to pages you’ll frequent more often, but all screens have important info you need to fill out to get the most out of your marketplace.
All premium and additional features are included with Bid Beacon Marketplaces.
Bid Beacon's Premium Features
Change the marketplace color theme, add a banner image, customize the link/access code, and add your logo to the header.
Recognize your sponsors with their logo, a description, and the link to their website. Optionally, you can add sponsor tiers.
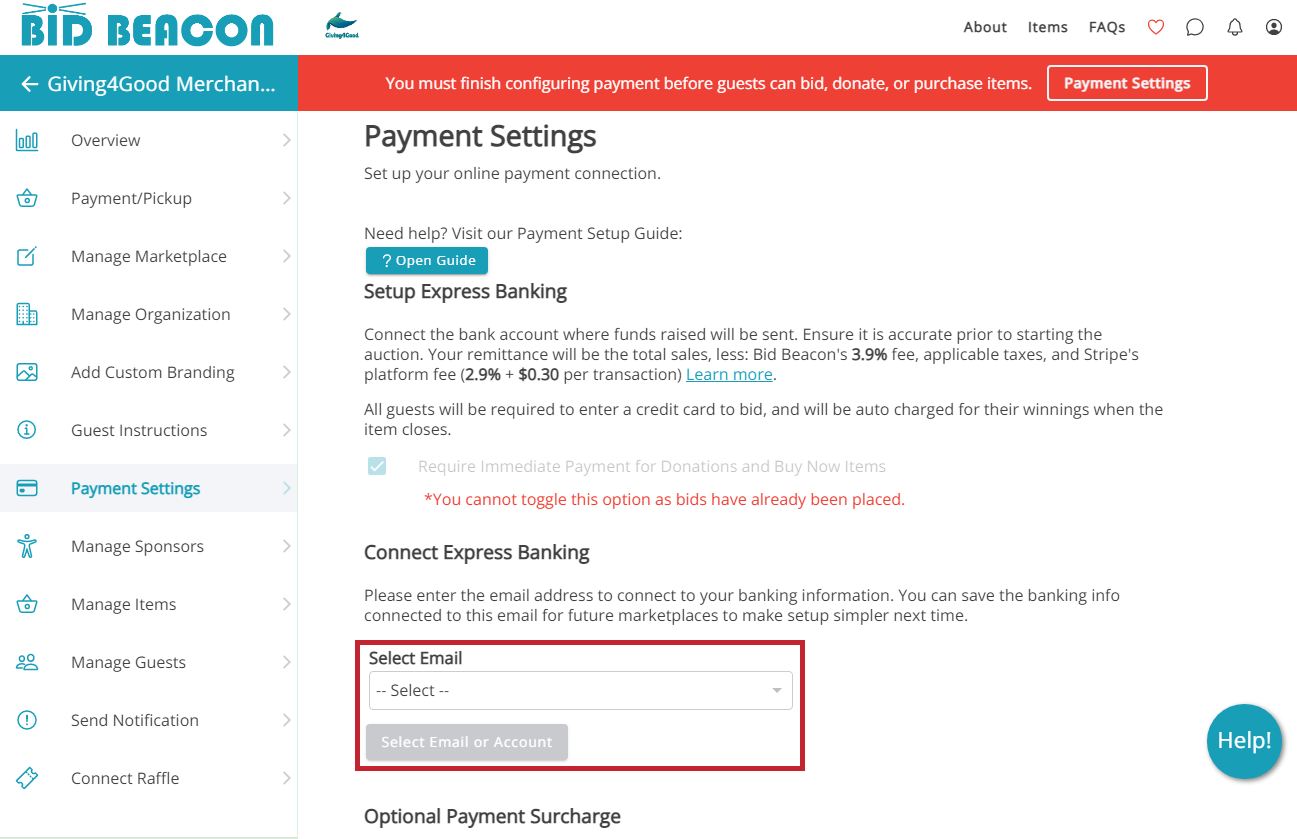
With Bid Beacon’s Marketplace, you will take payments using express banking through Stripe Connect. This will allow payments to flow directly into your bank account. Your guests will be required to enter their credit card in prior to making a purchase from your marketplace.
Additional Premium Features can be found throughout set up on other screens, don’t miss them!
- Video Promotions – adding a video link to each item in addition to images allows you to create engaging promotions for your items
- Additional Administrators – adding additional admins to help with marketplace setup
- Ticket Sales – Make paid tickets a requirement prior to being able to make a purchase
Bid Beacon's Additional Features
- Copy From Past Events: copy over your organization details, past items, past payment setup, and even past guests
- Multi-Currency Support: run your marketplace in CAD, USD, GBP, EUR, AUD and NZD
- Support by Email: we’re here to help at [email protected]
- Invoice & Receipt Generation: this is automatic once purchases have been made
- Set a Financial Goal and watch your funds increase as your items sell
- No Listing Fees so you can upload an unlimited number of items without worry
- Collect Surcharges & Taxes available if necessary. Adding a surcharge can help you run a marketplace at little to no cost by passing platform fees onto your guests
- Donation Collection can be added to give guests a way to support your marketplace without needing to purchase any items
- Staggered Item End Times allow you to have some items end earlier than others. Perfect for cycling out inventory automatically
- Traditionally known for online silent auctions, take advantage of Bid Beacon’s auction item types in addition to Buy It Now items
- Proxy Bidding or “bid as guest” in case someone doesn’t or can’t pay on their own
- Printable Item Sheets with QR codes that direct guests to items
- QR Code to Marketplace for placing on posters, programs, and all printed marketing materials
- Free Downloadable Guest App in Google Play and Apple app stores
- Automated & Custom Notifications by text, push and email
- Connect a Raffle with Raffle Rocket
- Promote Screens: Live Event Presentation
Step 4 - Payment Settings
From the Overview screen, click on Payment Settings to set up express banking through Stripe Connect. This is a pretty important step – so much so it has its own guide!
Step 5 - Add Items, Categories & Taxes or fees
You can’t run a marketplace without any items. From the Overview screen, click on Manage Items.
From here, we can create new or manage existing items, categories and add taxes or fees to items if necessary.
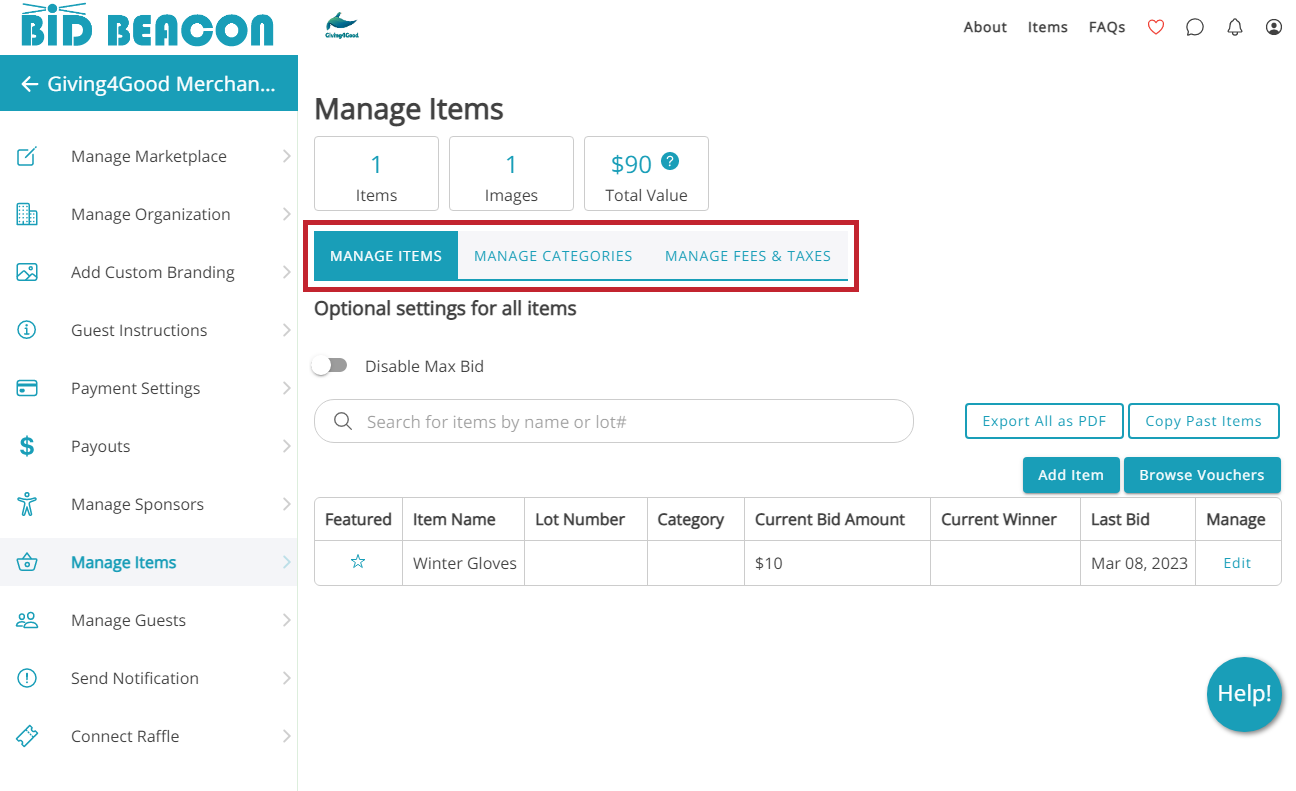
You have the option to create 5 types of items:
- Buy It Now – most of the time, your marketplace will use Buy It Now items. This item type is perfect for selling merchandise, tickets, or anything with a set price and limited quantity.
- Donation – this is for if you want to collect donations with no item attached.
- Bid Items – rather than setting a fixed price on a item, set a starting bid and increment to watch the price grow as guests place bids.
- Blind Bid – these items require bidders to place their highest bid right off the bat. All bids are kept secret (even from admins), and at the end, the highest bidder takes the prize. If two tie, the highest bid placed first would win.
- Live Item – used more for silent auctions that use Bid Beacon rather than marketplaces. Items auctioned off live at an event can be showcased within Bid Beacon, but bids are not placed within the app. The winner can be later invoiced for the item through the app.
For an in-depth guide on creating an item, check out the article Add Your Items.
Placing items into categories helps your guests navigate and find items they are interested in quickly.
- Manage categories
- Add new categories here, or when creating an item
- Edit or delete categories
- Sort or re-order categories
- Customize categories with custom background images
- Hide entire categories until bidding opens. Admins will see them, but guests will not. *not applicable for Marketplaces
- If you are required to charge Sales Taxes, you can configure the tax amounts here and they will be applied to every purchase. You complete the set up on each item.
- If you want to charge a set fee, such as a shipping fee, you can configure the fee name here. Then you will need to set it on each item it will apply to.
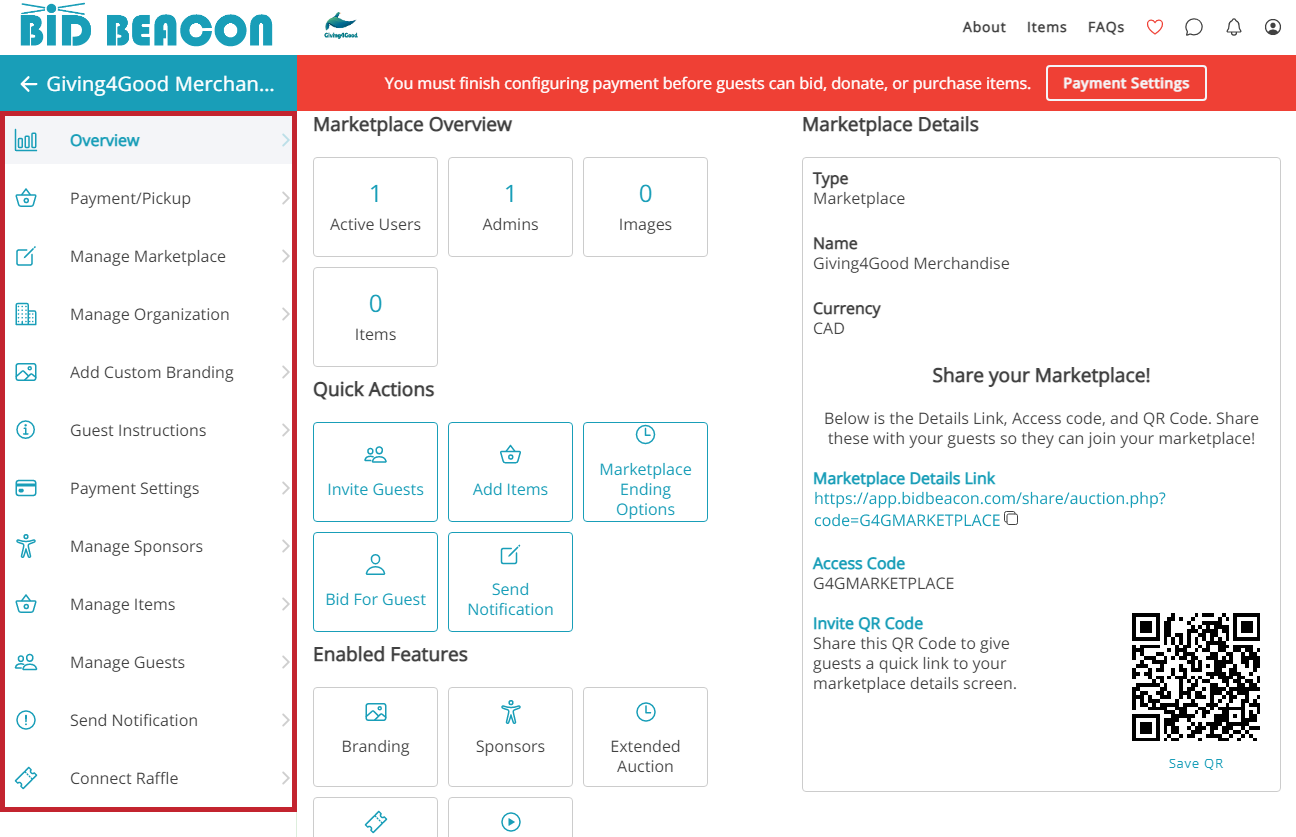
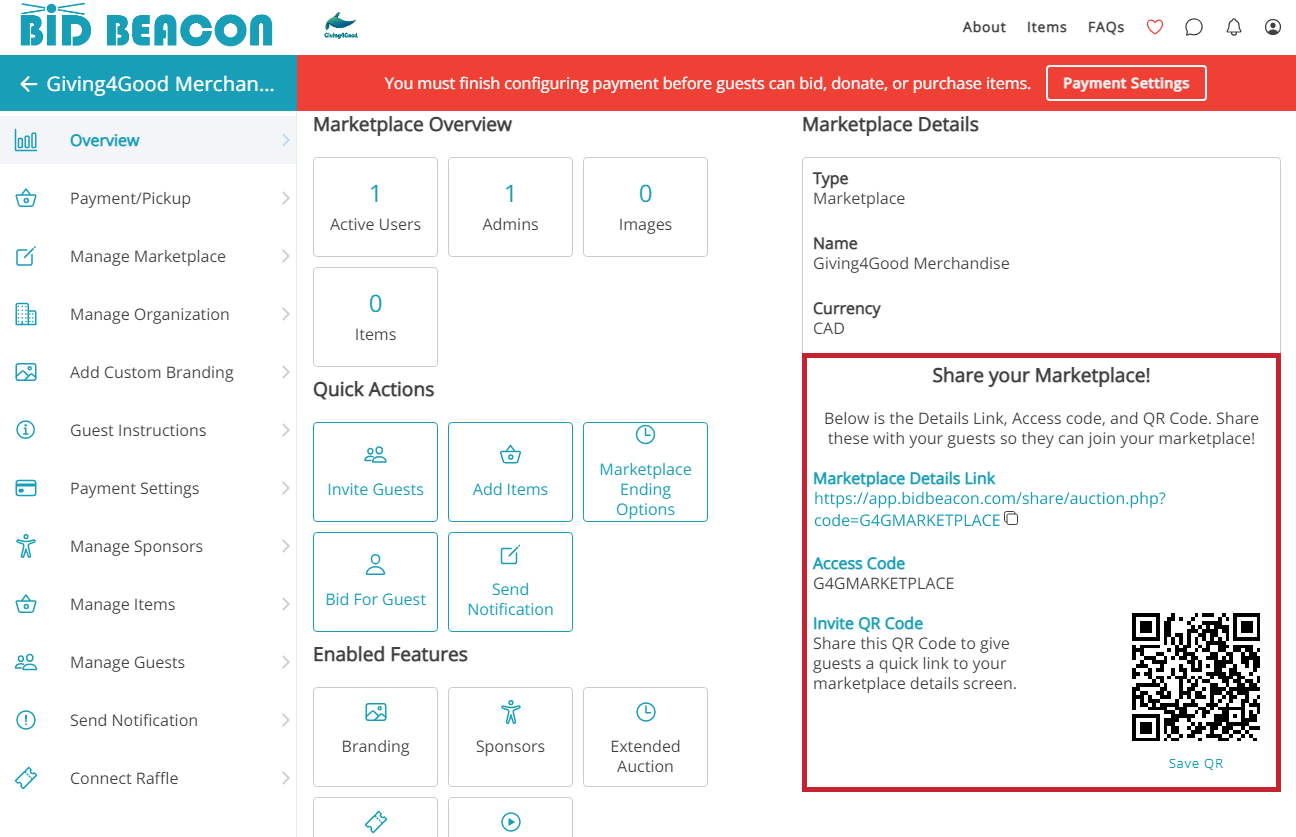
Step 6 - Share Your Marketplace
In addition to directly inviting your guests and network to join, be sure to share and promote your marketplace in a variety of ways.
On the Overview screen, check out the Share Your Marketplace! section.
- The Marketplace Details Link is great for linking to buttons on websites, posting to your social media channels, or adding to emails.
- If your guests are familiar with the Bid Beacon app, sharing the Access Code is another way for them to quickly join your marketplace after logging in.
- Click Save QR will download your marketplace’s unique QR code which can then be added to printed materials like programs, digital media, and more.
A few tips and tricks we’ve seen:
- Each item has its own link that can be shared by clicking the Link icon next to the Chat Bubble and Heart icons. Sharing these links on social media will generate a detailed preview of the item and its image.
- Invite guests from your last Bid Beacon event from the Manage Guests screen
- Use Custom Notifications to promote new items, ongoing promotions, and more, all throughout the app.
Step 7 - During the Marketplace
While your marketplace is open, there are many things admins can do to help move things along.
- Use the Payment/Pickup tab to manage items that have been paid for, and picked up by guests.
- Use Notifications to create fun messages bringing people back into the app. Perfect if you add new items or have limited-time promotions on certain items
- View progress and success in your reports with up to date information each time you export them
- Share item links and promote on social media to maximize your marketplace’s reach
What not to do while your marketplace is open:
- Don’t mess with the payment settings while the marketplace is ongoing. Some settings like “Require Immediate Payment for Donations and Buy Now Items” can’t be changed once bids are placed
- Don’t end the marketplace if you’re not truly ready for it to end as marketplaces cannot be reopened once closed
- Don’t change your organization country or province/state (unless you legit need to!) because that changes the currency of your marketplace
- A push notification and text message will be sent to each winner letting them know they won one or more items and linking them to view their results.
- An email will be sent to all winners listing what they’ve won. We also include the payment and pickup information you provided on the Guest Instructions screen in your dashboard.
- If your marketplace ends, a push notification and text message will be sent to non-winners declaring that the marketplace has closed, and linking them to view the end results.
- An email will also be sent thanking them for participating and letting them know they did not win any items.
- A push notification and text message declaring that one or more items have been won with a link to view those results.
- An email will be sent with the total earned off the items that have closed, and next steps for you to take.
- If your marketplace officially closes, a Closeout Report becomes available on the Reports screen which you can export as often as you want and it will update each time with new info as people pay and pick up their items.
Step 8 - Managing Payments and Pick Up
As purchases are made, admins can track their own purchases, and the purchases of all guests.
On the Marketplace Results screen, guests will only see the Your Winnings tab. Admins will have access to view Your Winnings, as well as all items unpaid for (Unpaid), all items that have been paid for but not yet picked up/delivered (Pending Pickup), and then all the items that have been fully paid for and also picked up/delivered (Complete).
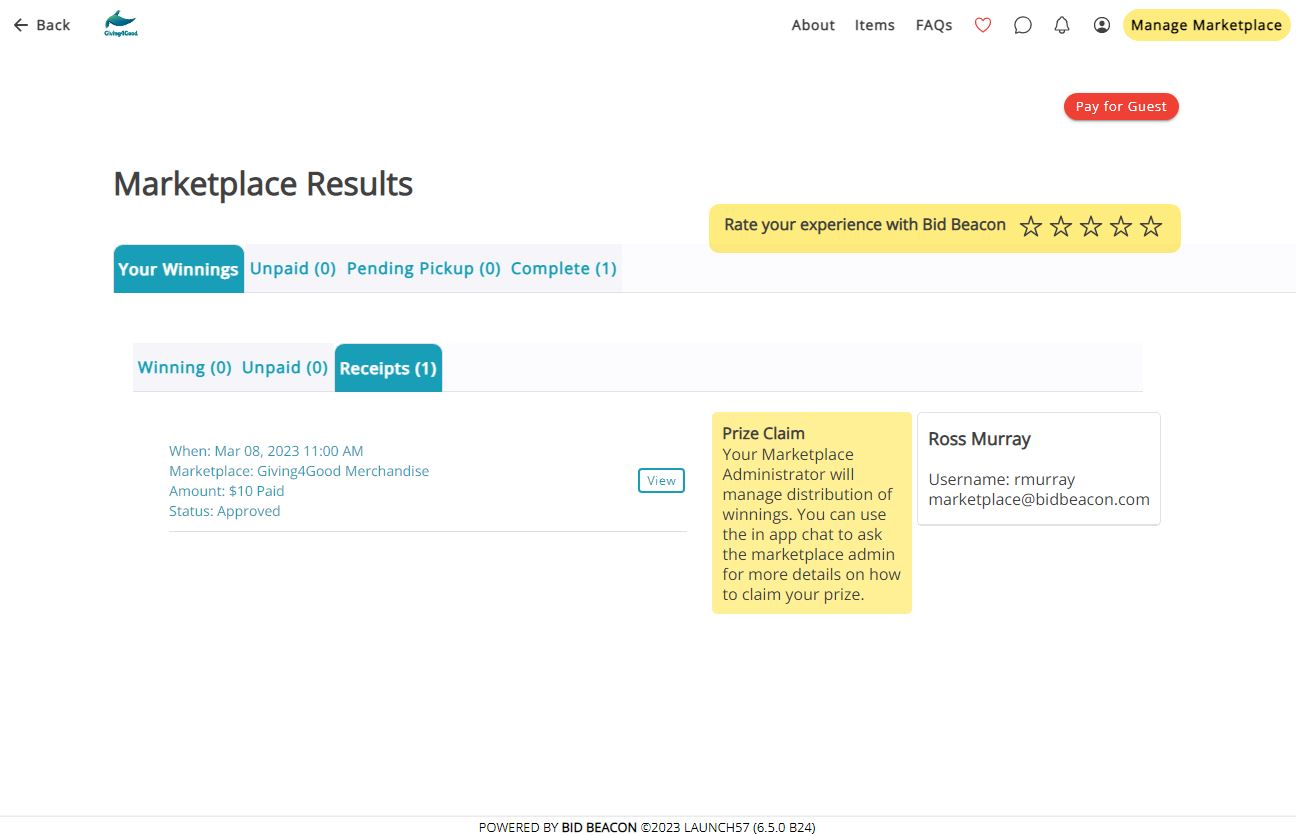
- Every admin and guest will have the ability to view a Winning, Unpaid, and Receipts tab which shows the items you are winning, won but not paid for, and receipts for items that are fully paid for.
- Prize Claim as written by marketplace admins on the Guest Information screen within the admin dashboard
- An option to download their Invoice or Receipt. Invoice if unpaid, receipt once paid in full.
- A list of every winner and what they won, how much they owe and their contact email.
- A search bar to search for someone by name, email, phone number, item name or lot number.
- A Download All Invoices link to download PDF copies of every invoice in the list.
- Admins can view every item that has been paid for but not yet picked up.
- A list of every winner and what they won, how much they paid, and their contact email.
- A search bar to search for someone by name, email, phone number, item name or lot number.
- A Download All Receipts link to download PDF copies of every receipt in the list.
- A Mark As Picked Up button to keep organized and easily track those purchases that haven’t been picked up or delivered yet. Once a purchase is marked as picked up, it will move over to the Complete tab.
- Lists all winners (purchasers) who have paid for and either picked up or been delivered their items.
- Each winner is listed with all of the items they have purchased. You can again download all receipts from this tab as well.
Step 9 - Marketplace End
The great thing with Bid Beacon Marketplaces is that they can stay open indefinitely! In your dashboard, you will have an option to Close Marketplace, but this should only ever be done if you absolutely do not need a marketplace anymore.
More Support Guides
Admin Auction Guide
Follow these steps to get started with Bid Beacon and create a silent auction.