Setting Up With Stripe
Bid Beacon is now integrated with CommuniBee to give fundraisers even more tools to manage and execute successful fundraising events. With CommuniBee, you can choose to subscribe (monthly or annually) to unlock the use of Alternate Payments.
Alternate Payments includes Stripe, Square, PayPal, and offline acceptance (cash, check, e-transfer, etc.). Bid Beacon will charge the credit card that was used to subscribe to CommuniBee for the platform fees incurred during the auction. If platform fees are not paid in full, the auction host will be restricted from creating future auctions until their outstanding balance is settled.
Please check out our Pricing page more information on CommuniBee, available subscriptions, and additional silent auction perks.
For quicker set up, it is recommended to use two browser tabs.
In one internet browser, open Bid Beacon and navigate to the Manage Auction screen
- Navigate to Payment Settings in left side menu
- To set up your online payment connection, select the SETUP STRIPE tab
In a second internet tab, log in to Stripe by signing in or creating a new account. Once signed in, navigate to your Stripe dashboard.
-
- In the upper right side of your dashboard, click Developers
In the left side menu, click API Keys
- Ensure you are viewing Live Keys (not test)
- Under Standard Keys, click Reveal Live Key under token on the Secret Key row
- Copy the Secret Key
- Return to your Bid Beacon tab and paste the Secret Key into the corresponding field
- Scroll to the bottom of the Bid Beacon tab and click Save
- Click the Test Payment button. Note that you will be using a real credit card to test a $1 payment. Once completed, a successful payment message will appear.
- Return to the Stripe tab and in the upper left menu, click Payments. Your $1 payment will appear here.
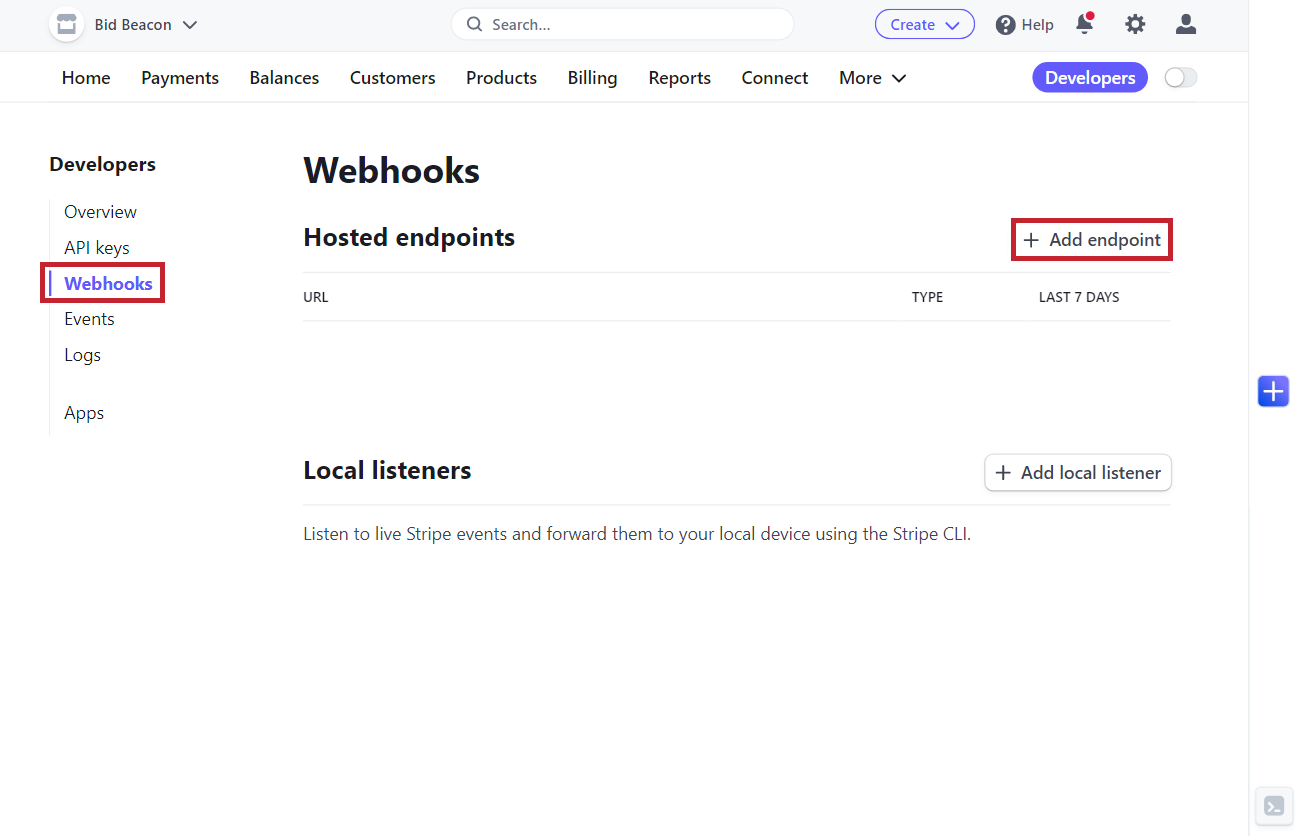
- Below API keys, select Webhooks
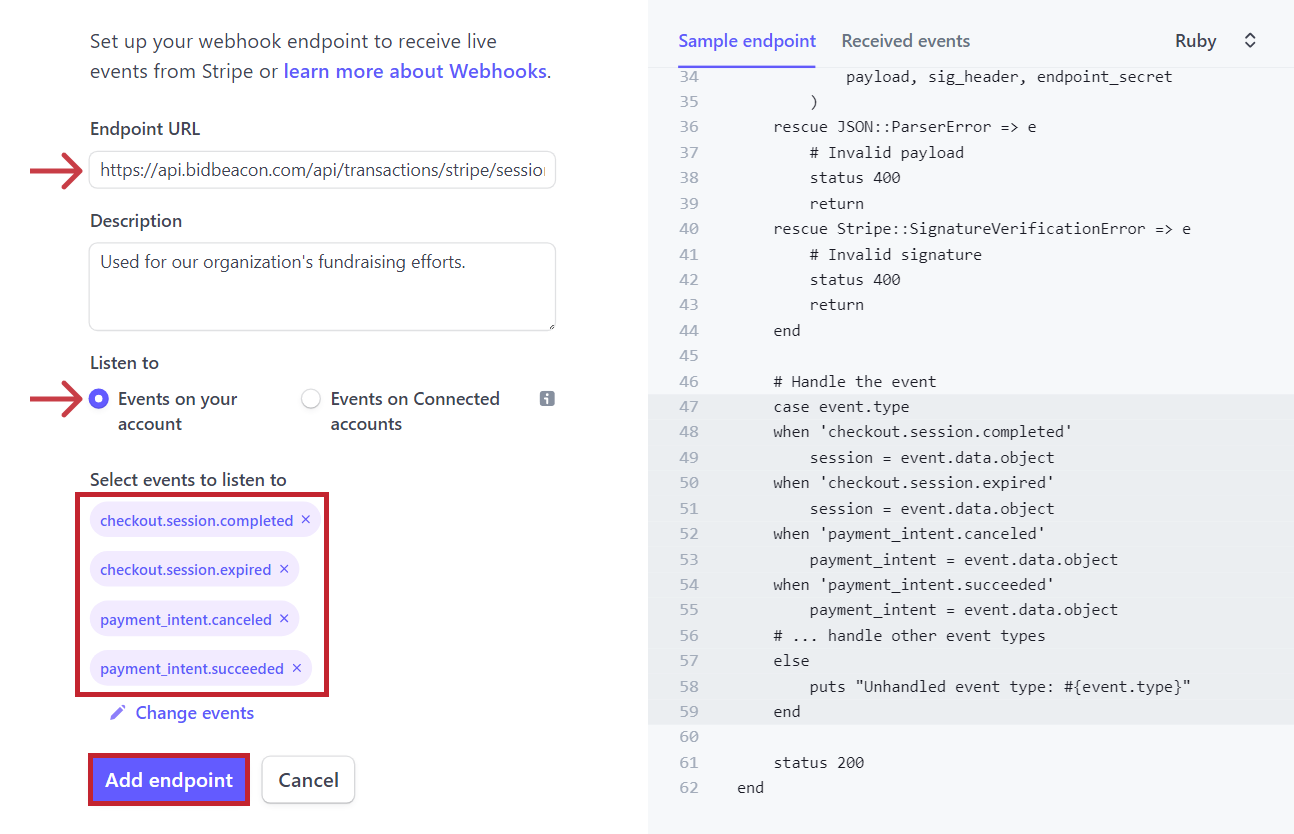
- If this is your first time using Stripe, you will need to create a new webhook. Start by clicking on + Add endpoint
- Enter in the following URL in the Endpoint URL field:
-
- https://api.bidbeacon.com/api/transactions/stripe/session
-
- The Description field is optional so if you choose to enter details here, provide detailed information so you know what the webhook is being used for
- Under Listen to, make sure Events on your account is selected
- Under Select events to listen to, click Select events
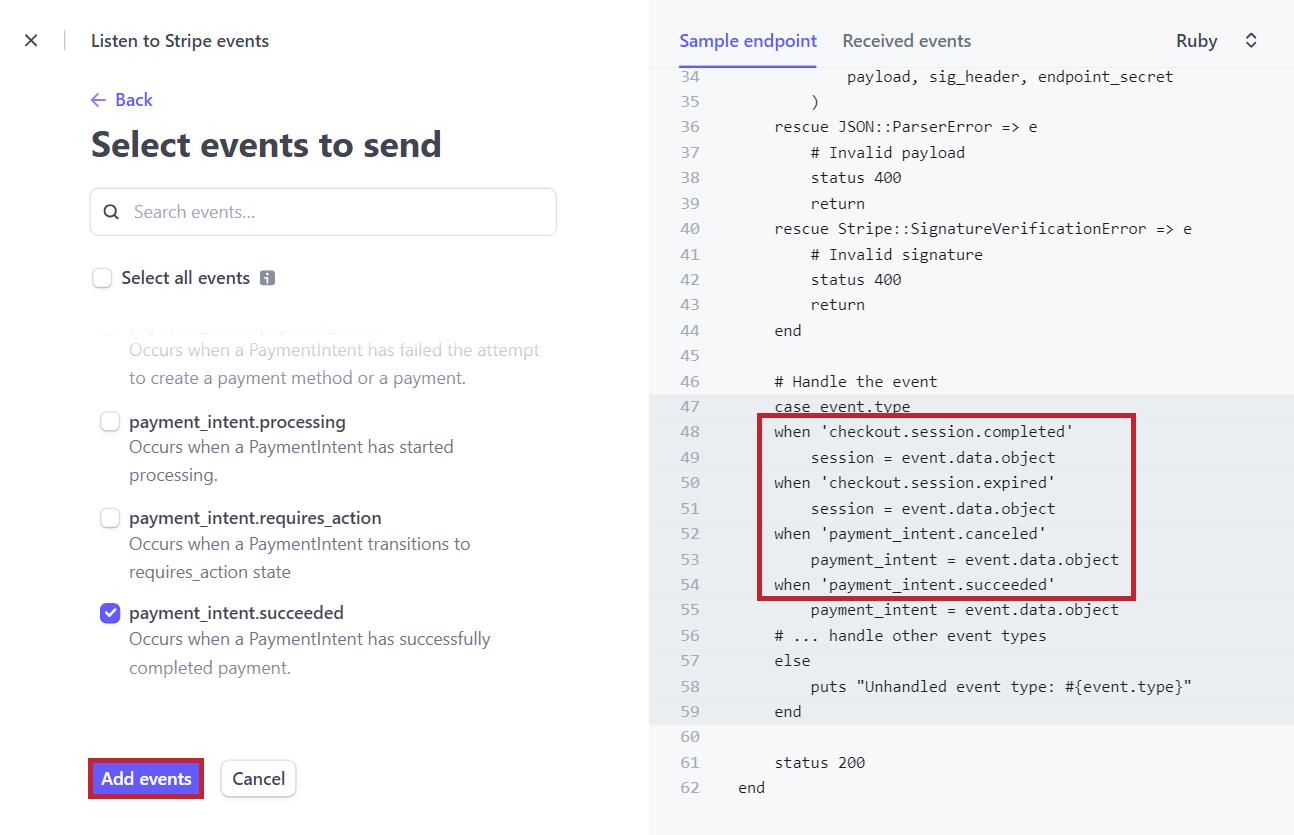
- Navigate to the Checkout category and select the following two events:
-
- checkout.session.completed
- checkout.session.expired
-
- Next, navigate to the Payment Intent category and select the following two events:
-
- payment_intent.canceled
- payment_intent.succeeded
-
- Once you have selected the four events above, click Add Events
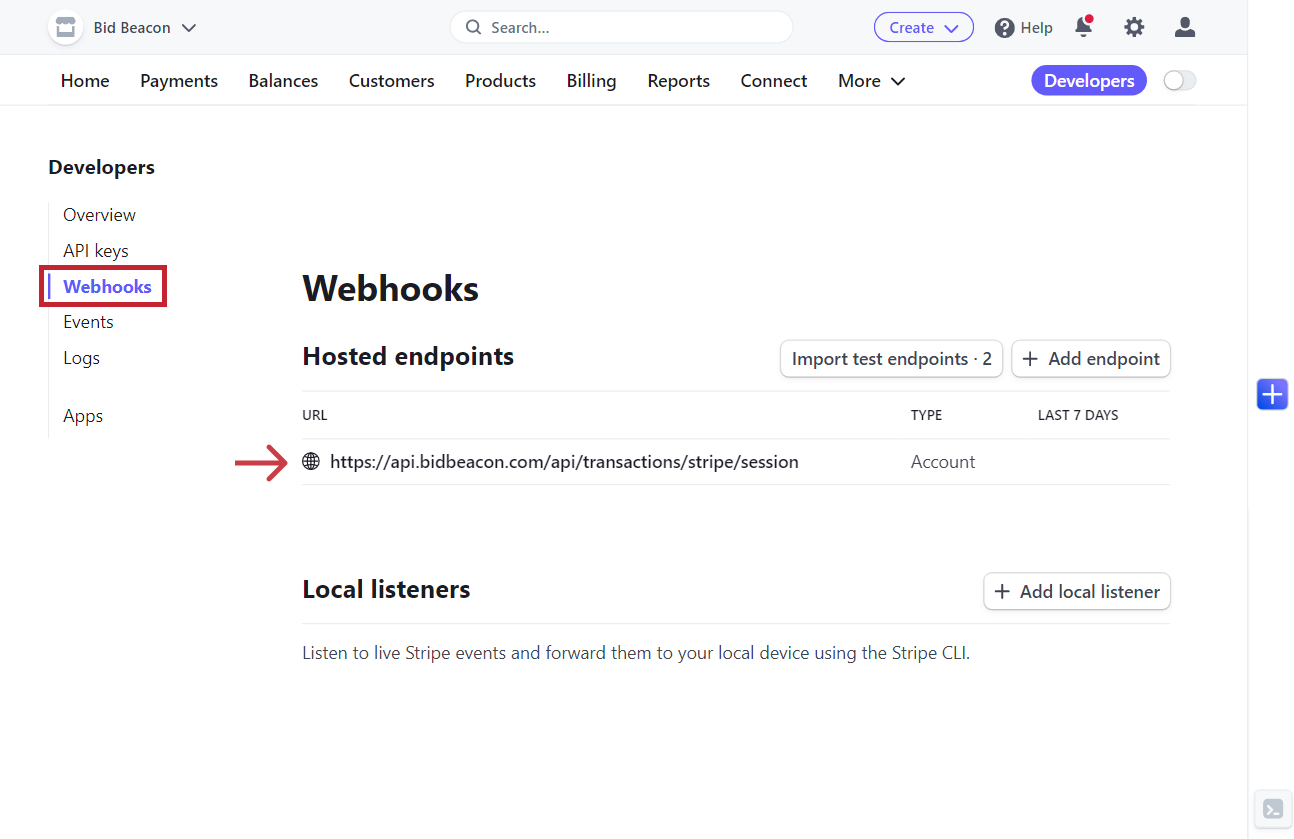
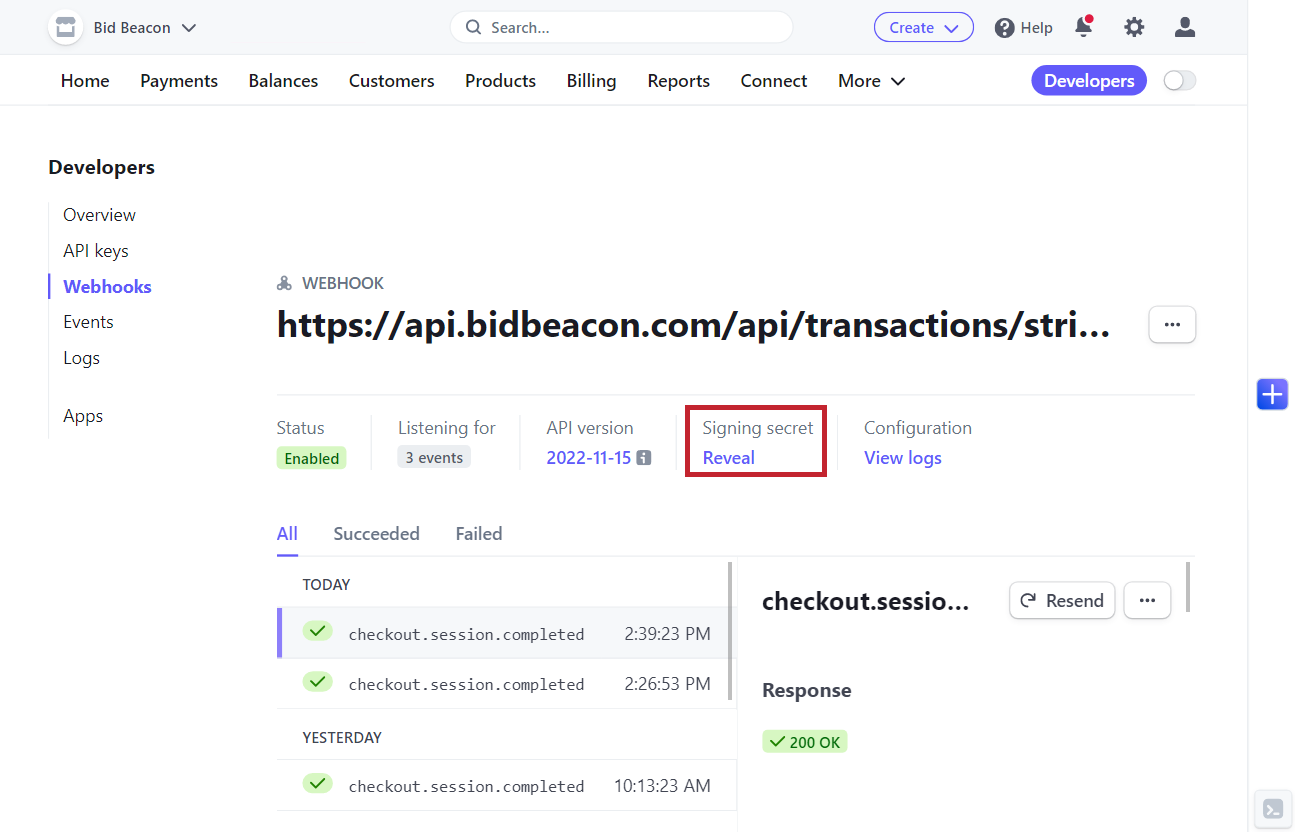
- Back on the Webhooks screen, click on the URL listed under Hosted endpoints
- Near the top of the page, find the Signing secret section and click on Reveal
- Copy the Signing secret key starting with whsec_
- Navigate to the Bid Beacon tab and paste this Signing secret key in the Stripe Webhook Secret field
IMPORTANT!
For admins who have used Stripe in the past, your API version may be outdated which can lead to payment errors! Follow the steps below to check and update your Stripe account’s API version.
- Log in to your Stripe Dashboard
- Click on the Developers button (as shown at the start of this guide)
- From the Overview tab, navigate down to the section called API version.
- The API version that you want to be using is 2022-11-15.
- If you have an outdated API version, select the Upgrade available… option at the top right of this section.
Want to Enable Auto Pay for Your Guests?
To automatically charge guests as soon as an auction closes, follow the steps below:
- Successfully set up your Stripe account by including the correct Publishable Key and Secret Key from your Stripe dashboard.
- Ensure that you have run at least one Test Payment.
- From the Payment Settings tab, below the Stripe Publishable Key field will be a option that says, “Require Credit Card and Autopay at Auction Close“. Click this setting to enable auto pay.
***This setting cannot to enabled if bids have already been placed, so make sure everything is set up prior to your auction start date